How to Play Journey to the Watchtower — Controls & Run Basics
The run basics of Journey to the Watchtower: how a crossing works, what ends it, how the 15-player server scoreboard reads, and how upgrades, rolls, and rebirth fit one attempt.
Learning how to play Journey to the Watchtower means learning one loop and three hazards. The loop: cross the desert, fall short, spend what you earned, come back permanently stronger. The hazards: the deadly light, the Watchtower’s own attacks, and the giant sandworm. Everything else — the Insanity economy, the Spirits and Sins rolls, the rebirth system, the Farthest leaderboard — exists to serve that loop. This guide walks through a run from spawn to reset using only what the official description and dated community coverage verify.
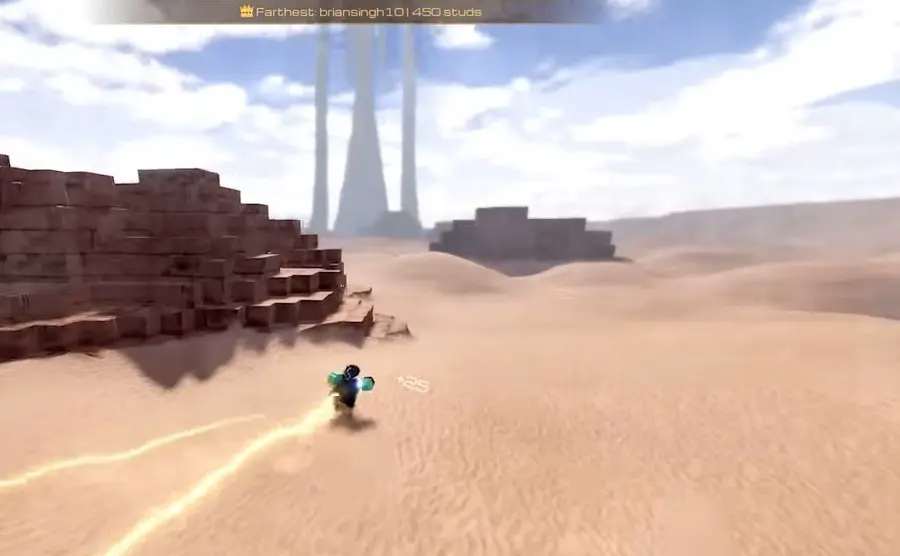
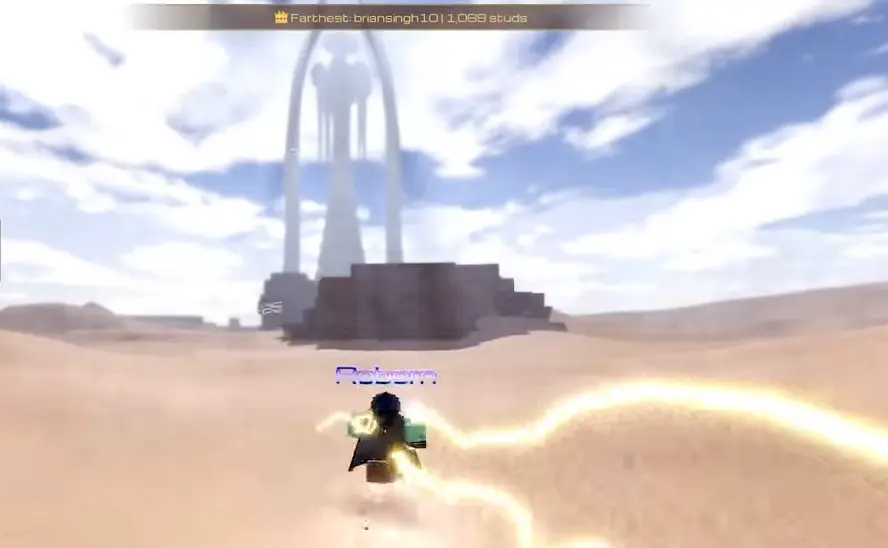
The server HUD tracks the Farthest run in studs — the scoreboard every run feeds.
Anatomy of a single crossing
A run starts at the desert’s edge with the Watchtower visible in the distance — a thin silhouette on the horizon that never seems to get closer on a fresh save. You move outward while managing your stamina, the resource that keeps the crossing alive. The farther you push, the more the environment works against you: the deadly light punishes exposure, and the tower’s attacks reach into the mid-distance zones as you approach them.
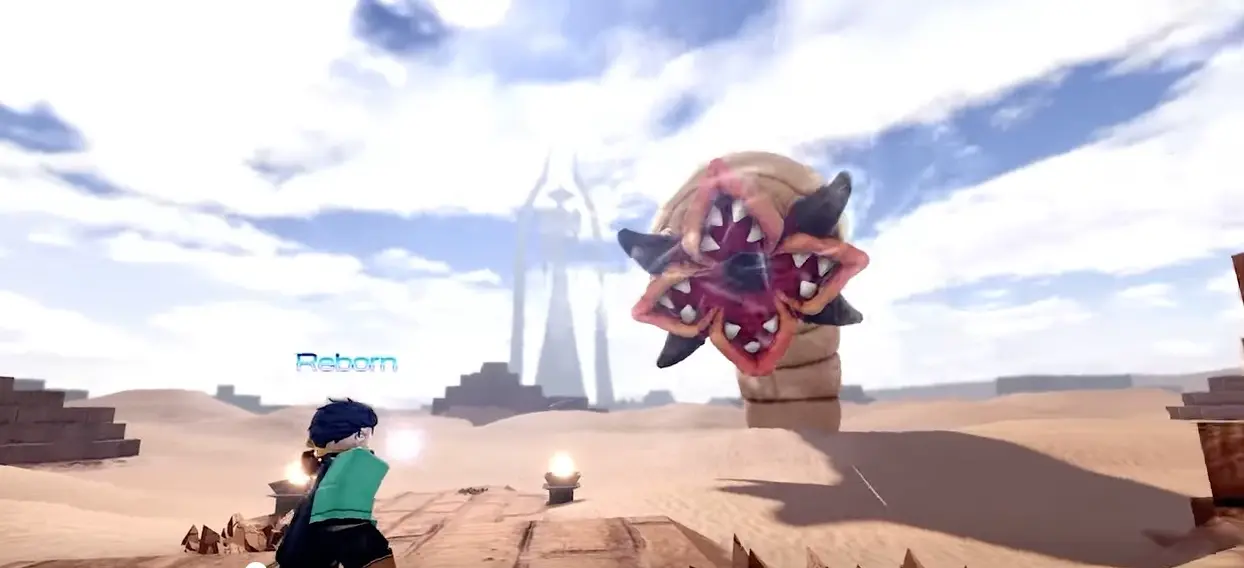
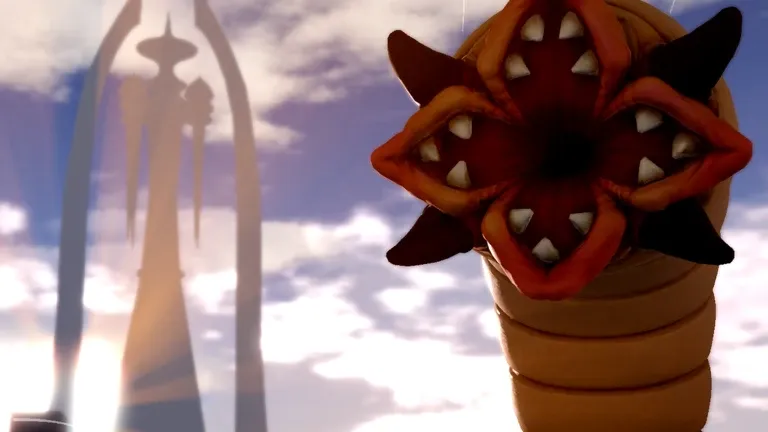
Then there is the worm. The giant sandworm is the hazard most runs end on, and community coverage is blunt about its role: the game asks how far across the desert you can get before the worm devours you. It is not a puzzle to solve on a fresh save — it is the wall your stats have to grow through. When any of the three ends the attempt, the run converts into Insanity, the currency of the upgrade economy, and the loop’s promise kicks in: every death makes the next journey easier.
Distance is objective and public. The server HUD tracks the Farthest run in studs — real screenshots show records in the hundreds on newer saves and past a thousand on developed ones. Up to 15 players share a server, so the leaderboard doubles as a live comparison with everyone running the same desert.
How fast a run can fall apart
A short look at the survival question every run answers — stamina, speed, and the worm all get a vote.
Upgrades, rolls, and rebirth between runs
Between runs, three systems convert your output into power. Insanity — the main currency — buys the three stat lines the official description names: stamina, speed, and Insanity gain. Stamina extends the crossing, speed decides whether the worm and the tower’s strikes catch you, and Insanity gain raises the payout of every future run. The economy is covered in full on the Insanity currency guide.
Rolls are the second layer: the official description says "Roll powerful Spirits & Sins," and the roll interface is where a run’s power gets its personality. No verified list of individual Spirits or Sins exists in any checked source, so treat in-game descriptions as the only current authority. Codes are the third layer — the five active codes grant 37,500 Insanity combined, and the codes page keeps the verified list.
Finally, rebirth converts a developed save into permanent strength. The official description lists it as a core pillar — "♻️ Rebirth to become permanently stronger" — and it is the reason the desert gets easier each session. When your Farthest record stops moving across several attempts, that is the reset signal; the rebirth guide covers the decision. For the sequenced beginner version of all this, start with the beginner guide.
Menus you will actually use
Three interfaces matter. The tutorial unlocks the Store icon on the left side of the screen, which holds the upgrade purchases and the Codes tab at its bottom — the redemption point for every code. The roll interface is where Spirits and Sins are rolled. And the HUD carries the Farthest leaderboard in studs, the objective measure of progress. Key bindings themselves are not documented in checked sources and can vary by device, so rely on the in-game control hints rather than memorized lists from other sites.
One interface note worth flagging: the experience listing currently reads "[HARD MODE] Journey to the Watchtower," and the experience was last updated on September 6, 2026. What the hard-mode prefix changes has not been published in checked sources — if the desert feels meaner than the guides describe, that prefix is the likely reason, and the updates page tracks what the developer confirms.
FAQ
How do you play Journey to the Watchtower?
Each run is a crossing: move through the desert toward the Watchtower on the horizon, survive the deadly light and the tower’s attacks, avoid the sandworm, and get as far as your stats allow. Death ends the attempt but funds the next one — Insanity earned goes into upgrades, and rebirth converts progress into permanent strength.
What are the controls?
This guide deliberately does not list key bindings, because they are not documented in any checked source and can vary by platform. Check the in-game control hints and the tutorial, which introduce movement and the run’s core actions before your first crossing.
How many players share a server?
Servers hold up to 15 players. The HUD shows a Farthest leaderboard measured in studs, so you always know how your longest run compares with everyone else in the server.
What does rolling Spirits and Sins do?
Rolling is the game’s power layer on top of the stat upgrades — the official description says "Roll powerful Spirits & Sins." No verified list of individual Spirits or Sins, tiers, or rates has been published in any checked source, so read the roll interface in-game and treat third-party tables with skepticism.
How do I survive the sandworm?
Mostly with stats rather than reflexes. The worm ends runs that lack the speed to escape and the stamina to keep moving — coverage of the game frames the entire experience as getting as far as possible before the worm devours you. Buy speed and stamina with Insanity, rebirth for permanent strength, and the worm’s territory gradually becomes passable.
What is the goal state?
Reaching the Watchtower — the structure waiting at the end of the desert. The whole progression loop exists to close that distance: every death makes the next journey easier, and the Farthest HUD in studs is the scoreboard that shows the gap shrinking.
Sources and verification
These links show where this page's factual inputs came from. Community and independent references are not developer announcements.
- Roblox experience listing (Official) - Game identity, creator, player limit and public experience description
- Roblox Games API snapshot (Official) - Visits, favorites, active-player snapshot, creation and update timestamps
- Nerds Chalk codes list (Community) - Code rewards, redemption steps and expired list, September 2026
Page inputs checked .
Recommended guides
Data source: Official Roblox experience description and Games API snapshot, cross-checked against community coverage. Last verified .